
Confession: I never thought a smartphone app could replace my laptop for ‘serious’ editing—until an impulsive evening, a cup of chai, and a dare from a friend led me down a rabbit hole called InShot. This isn't a flawless expert review: it's my messy, adrenaline-fueled journey, stumbles and surprises included, as I tried to craft a pro-level video (with overlays and those hip captions) using nothing but my phone. If you've ever side-eyed mobile editors wondering 'Can they really do it?'—grab a snack, because I’m about to spill all the behind-the-scenes chaos and triumphs.
Why I Ditched My Laptop: The Curiosity (and Chaos) of Smartphone Video Editing
The Initial Skepticism: Can Mobile Editors Really Go Pro?
Let’s be honest—if someone had told you a few years ago that you could edit professional videos using just your smartphone, you’d probably laugh it off. I did too. My mind was stuck in the world of desktop giants like After Effects, where every click felt like a mini programming lesson. Back in March 2021, I remember staring at After Effects for hours, lost in a maze of menus and cryptic icons. It was powerful, sure, but “user-friendly” wasn’t the word I’d use. So, when I first heard about user-friendly video editing applications like InShot, I was more than a little skeptical. Could a cartoonish mobile app really compete with the big leagues? Was it even possible to create pro-level content without a laptop?
How a Late-Night Dare (and Chai) Set the Experiment in Motion
It all started on a random night, fueled by a strong cup of chai and a wild idea. I was chatting with friends about first-time video editing experiences, and someone dared me: “Why not try editing a full video on your phone? No laptop, no fancy software—just a mobile app.” The challenge was set. I’d already dabbled with CapCut before, but InShot was uncharted territory. I wanted to see if I could really pull off a professional-looking video using only my smartphone. And yes, I’m not lying—I just installed InShot, crack mode, because Play Store had watermarks…
First-Time Video Editing Experiences: The InShot Interface Review
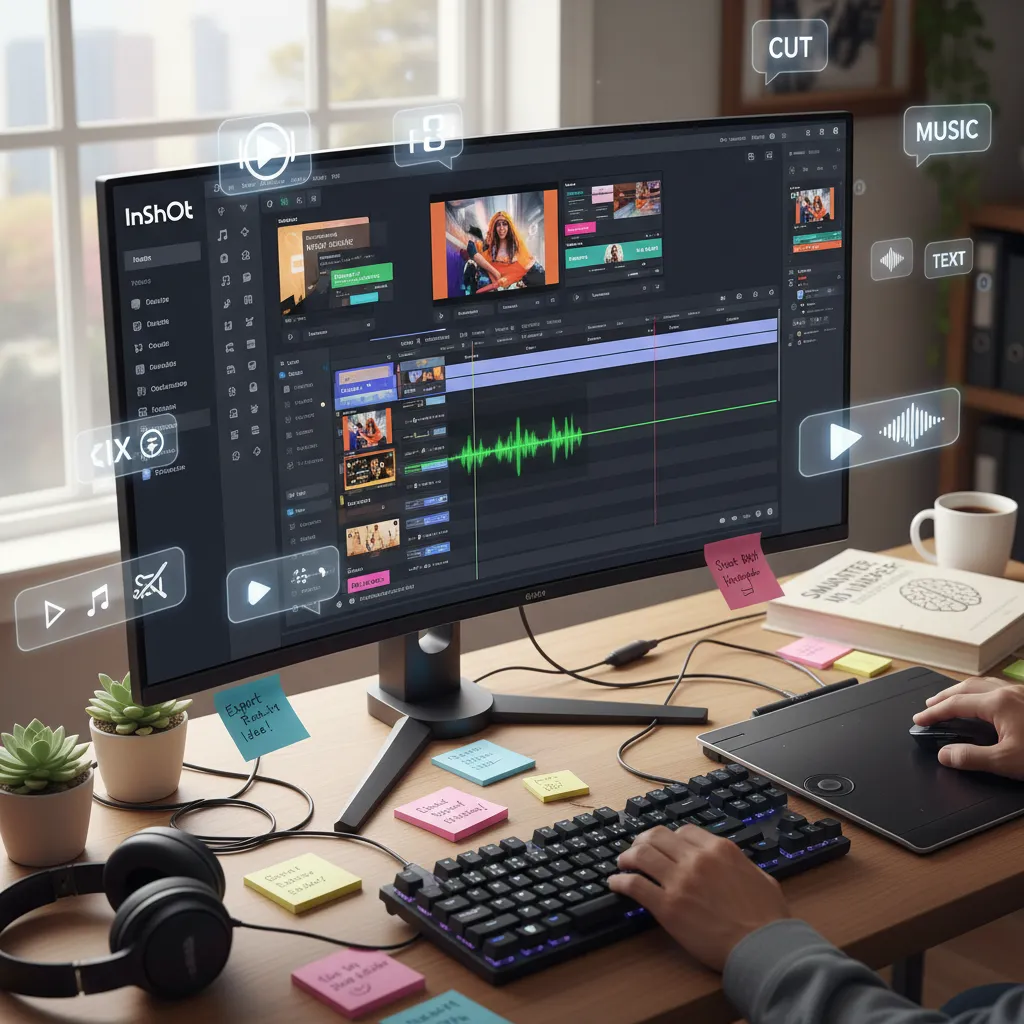
The moment I opened InShot, I was hit with a wave of curiosity—and, honestly, a bit of chaos. The interface looked almost cartoonish at first glance. Bright colors, big buttons, playful icons. Was this a toy or a pro tool? But as I started poking around, something unexpected happened: I actually understood what was going on. Everything was laid out in a way that just made sense. No endless dropdown menus, no hidden features buried three clicks deep.
Here’s what stood out in my first InShot interface review:
- Intuitive Layout: All the main editing tools—trim, split, speed, filters, text—were right there, front and center. No hunting required.
- Drag-and-Drop Simplicity: Want to add a clip or rearrange scenes? Just drag and drop. It felt almost too easy.
- Instant Preview: Every change I made was visible immediately, no rendering delays. That’s a game-changer for first-time video editing experiences.
- Playful Yet Powerful: The icons might look cartoonish, but the features are surprisingly robust. From transitions to effects, everything was a tap away.
Comparing InShot to Desktop Editors: Chaos vs. Clarity
If you’ve ever tried learning After Effects or Premiere Pro as a beginner, you know the struggle. My first encounter with After Effects was pure chaos—layers, keyframes, and settings everywhere. In contrast, InShot felt like a breath of fresh air. It’s no wonder so many first-time users report smooth acclimation. The app is designed for mobile content creators who want to get started fast, without a steep learning curve.
Even the installation process was different. I downloaded InShot freshly via Chrome (not the Play Store) to avoid those pesky watermarks. Within minutes, I was editing. No complicated setup, no license headaches. Just tap, import, and go.
Embracing the Chaos: The Realities of Smartphone Video Editing
Of course, it wasn’t all smooth sailing. Editing on a small screen comes with its own brand of chaos. Fat-finger mistakes, accidental taps, and the occasional notification popping up mid-edit. But there’s a certain thrill to it—a sense of freedom and immediacy. You’re not chained to a desk or waiting for a laptop to boot up. You can edit anywhere: on the couch, in a café, even during a late-night chai break.
And while InShot’s interface might look playful, don’t be fooled. Underneath the cartoonish surface is a surprisingly powerful set of tools. For anyone exploring user-friendly video editing applications for the first time, it’s a revelation. You don’t need to be a tech wizard or a seasoned editor. If you can tap, swipe, and drag, you can create.
I’m not lying—I just installed InShot, crack mode, because Play Store had watermarks…
That’s how my wild ride with InShot began: with skepticism, curiosity, and a little bit of chaos. And honestly? I wouldn’t have it any other way.

Smarter, Not Harder: Playing with InShot’s Tools, Overlays, and (Oops) Deleted Text
Scouting for Overlays and the Free PNG Treasure Hunt—Tube Sansai to the Rescue!
Let’s be real: every editor, whether you’re just starting out or you’re deep into your content creator journey, needs good overlays and PNGs. You can’t make pro-level videos with just the basics. When I started my InShot video editing tutorial adventure, I knew I needed more than what the app offered. So, I went on a good old-fashioned PNG treasure hunt.
First stop? YouTube, of course. There’s this creator, Tube Sansai, who’s a lifesaver. I grabbed overlays straight from his video descriptions—no shame, everyone does it. If you’re downloading overlays for video editing, YouTube descriptions are goldmines. But I didn’t stop there. I found a PNG website (not sponsored, I promise) that offers over 100,000 free PNG assets just for signing up. Seriously, visit PNG sites—you’ll thank me later. It just saves you when you’re in a pinch.
Here’s why this matters: InShot’s built-in sticker library is fun and cartoonish, but if you want your edits to stand out, you need custom overlays. Downloading overlays for video editing from trusted sources lets you add that extra flair—think animated emojis, unique backgrounds, or those little icons that make your video pop. Community sharing is the backbone of creative editing. Everyone borrows, everyone shares. That’s how you level up your edits.
Surprising Win: Editing Captions in InShot vs. CapCut (and Where Layering Drove Me Mad)
Now, let’s talk captions. If you’ve ever tried editing captions in InShot vs CapCut, you’ll notice something right away: InShot is just smoother. When I synced my captions to my vocals, there was almost no drift. In CapCut, sometimes your voice and captions don’t quite line up, and you end up nudging things back and forth forever. InShot’s interface, with its easy-to-understand, almost cartoonish vibe, made the process less stressful—even for a first-timer like me.
Here’s how it went down:
- I imported my vocal track and started adding captions right where I needed them.
- InShot let me drag, trim, and animate text with a few taps. The font choices (Roboto Medium, Bebas, etc.) and auto-animations made my captions look pro without much effort.
- Editing was so smooth, I barely noticed any hiccups—until I hit the overlays and layering wall.
Layer management in InShot? That’s where things got tricky. Unlike CapCut, where you can drag layers up and down easily, InShot sometimes makes you wrestle with overlays. If you want to move a PNG or sticker behind or in front of something, you have to cut and adjust clips, which can be a pain. There’s no simple “bring to front” or “send to back” button. It’s not a dealbreaker, but it’s something to keep in mind if you’re layering lots of elements.
That Heart-in-Mouth Feeling When You Delete the Wrong Text or Layer—How I Fixed It (Sorta)
Let’s talk about the “oops” moments—because you’ll have them. There I was, deep into editing, when I accidentally deleted the wrong caption. My heart stopped. If you’re new to InShot, the first time this happens, you’ll panic. But here’s the fix: InShot has an undo button (thank goodness), so you can usually bring back what you lost. Still, it’s not as forgiving as some desktop editors, so save your work often and double-check before you hit delete.
When I lost my text, I just re-added it, picked the font again, and matched the timing. It wasn’t perfect, but it worked. The key is not to freak out—just retrace your steps and use the undo feature. And if you’re adding overlays or PNGs, keep your files organized so you can quickly re-import anything you lose.
Visit PNG sites—you’ll thank me later. Seriously, no one’s sponsoring me. It just saves you when you’re in a pinch.
InShot’s AI tools, overlays, and sticker library really do open up creative possibilities, even if you have to wrestle with layers now and then. And with the right resources—like those free PNG sites and YouTube overlay downloads—you’ll be editing smarter, not harder, in no time.
The Not-So-Perfect Finish: Animations, Bugs, and Exporting Like a Semi-Pro
You’ve made it to the final stretch—your timeline is packed, your overlays are in place, and your captions are looking sharp. But if you think the finish line is just a tap away, think again. This is where the real magic (and mayhem) of the InShot video editing tutorial begins: keyframe animation editing, wrestling with the ‘ease’ graph, and the all-important dance of preview-export-preview.
Let’s start with the fun stuff: animations. InShot makes it almost too easy to slap on a sticker or animate a text box. You tap, you drag, and suddenly your PNG is bouncing across the screen. But here’s the catch—those default animations? They’re quirky. Sometimes, they’re a little too quirky. When you first dive into keyframe animation editing, you’ll find that InShot labels its graph as ‘ease’, which sounds simple enough… until you realize you’re not quite sure what each curve does. I’ll admit, my first attempt looked more like a PowerPoint gone wild than a pro edit. My ‘takla’ PNG spun off the screen, captions faded in at odd times, and an emoji sticker did a weird jittery dance I definitely didn’t plan.
This is where the preview button becomes your best friend. You think you’ve nailed the timing, but trust me: “You’ll spot mistakes only when you preview, so don’t get lazy—my 'finished' video was definitely not finished… until the fifth export.” InShot’s interface is friendly, but it’s easy to accidentally delete a text layer or misalign an animation. Sometimes, you’ll trim a clip and realize the animation you set up is now out of sync. Other times, a background element will stubbornly refuse to stay behind your main subject. Each time you preview, you’ll catch something new—a rogue sticker, a caption that lingers too long, or a fade that’s just a little too slow.
And then there are the bugs. Nothing major, but enough to keep you on your toes. I ran into a few moments where an ending animation would trigger unexpectedly, or a sticker would vanish after a trim. These little hiccups are part of the learning curve, especially when you’re using features for the first time. The good news? Most of these can be fixed with a quick undo or by manually resetting the animation. The bad news? You’ll probably have to preview, adjust, and preview again—sometimes more times than you’d like to admit.
Now, let’s talk about going pro with your video export settings in InShot. Here’s where the app really shines: you can export your masterpiece in up to 4K at 60fps, all from your phone. For this project, I went with 60fps to keep everything buttery smooth, especially since animations and overlays look best at higher frame rates. But exporting at the highest settings isn’t just about tapping a button. You need to double-check your timeline, make sure every animation is intentional, and confirm that your captions are perfectly synced. If you skip this step, you might end up with a final video that’s full of tiny mistakes you didn’t notice during editing.
There’s a weird satisfaction in this preview-export-preview cycle. It’s a little dance—sometimes frustrating, always necessary. Each export is a chance to spot a new bug, fix a timing issue, or tweak an animation curve. By the fifth export, you’ll finally feel like a semi-pro. Not perfect, but definitely proud.
Looking back, the journey from Capcut to InShot has been wild, honest, and full of surprises. InShot’s app features and pricing make it accessible for anyone ready to try professional video editing on a smartphone. The animation tools are powerful, but they demand patience and a willingness to experiment. You’ll make mistakes, you’ll fix them, and you’ll learn something new with every project.
So, if you’re ready to create your own wild ride, don’t be afraid of the not-so-perfect finish. Embrace the bugs, play with the keyframes, and remember: the real pros are the ones who keep previewing until it’s just right. Your phone is more than enough—now go make something awesome.


