
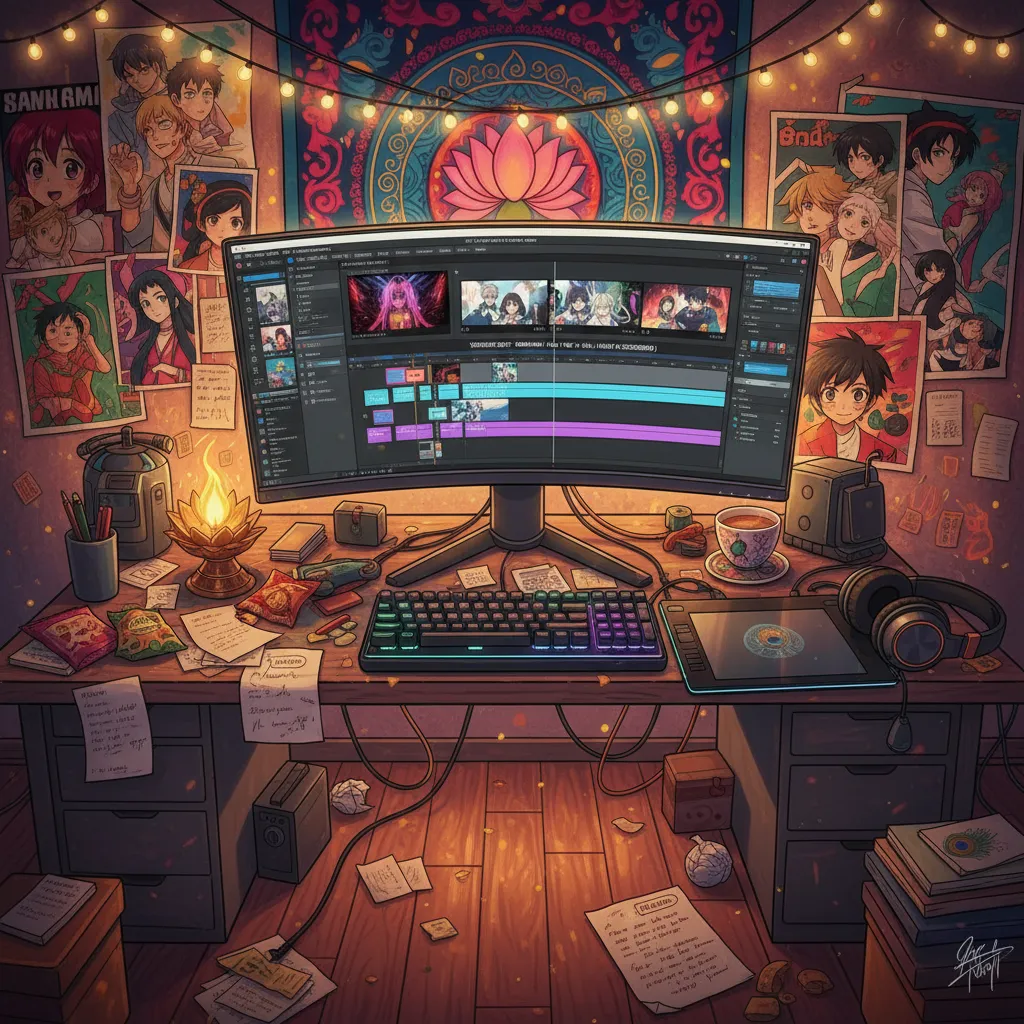
You ever hit record, heart racing, palms sweaty, only to realize your room is hotter than the Sahara and you have to redo your voiceover for the fourth time? Welcome to my world of mobile AMV editing, where glitches, ambition, and the search for the perfect shake effect collide. Today, I'm sharing not just the 'how' of anime music video editing using Alight Motion, but a few unexpected twists from my own chaotic creative cave.
The Only Indian AMV Editor (Probably) With Hindi Voiceover—Why Even Bother?
Imagine you’re scrolling through YouTube, searching for the next great AMV Editing tutorial. Most videos sound the same—robotic, scripted, and often in English. But suddenly, you stumble upon a creator speaking directly to you, in Hindi, with real excitement in his voice. That’s when you realize: this feels different. That’s exactly the moment I experienced when I decided to break the mold and use Hindi voiceover in my AMV Editing tutorials.
Why Hindi Voiceover Makes Your Tutorials Stand Out
Let’s be honest—most AMV Editing content is in English. But if you’re an Indian viewer, sometimes you just want someone who gets your jokes, your slang, and your vibe. That’s why I started adding Hindi voiceovers. It’s not just about language; it’s about connection. When you hear tips, tricks, and even mistakes explained in your own language, everything just clicks faster. Suddenly, AMV Editing doesn’t feel like a distant, foreign skill. It feels like something you can do, right now, on your mobile.
Audience Engagement: The Power of Listening to Your Viewers
Here’s the real twist—I never expected my voiceover to matter so much. As I said in one tutorial:
"Maine kabhi bhi nahi socha tha ke aap mere voice over ko itna jyada miss karte ho."
But you proved me wrong. My comment section exploded with requests, memes, and even a few desperate pleas for more Hindi voiceover. The demand was wild. I saw firsthand how powerful audience engagement can be. When you listen to your viewers and give them what they want, your content doesn’t just get watched—it gets shared, discussed, and remembered.
Becoming ‘That’ AMV Guy: Confidence and a Little Doubt
With every new video, I felt a mix of confidence and doubt. Am I really the only Indian AMV editor on YouTube doing Hindi voiceover? Maybe, maybe not. But as the comments kept rolling in, I realized it didn’t matter. What mattered was that my videos were helping people, and my voice—literally—was making a difference.
It’s a unique feeling to be recognized for your distinct style. When you carve out a niche, like Hindi voiceover in AMV Editing, you’re not just another face in the crowd. You become the go-to person for a whole community. And that’s a powerful place to be, especially in such a competitive space.
- Distinct Content Style: Hindi voiceover sets your tutorials apart from the crowd.
- Audience Feedback Drives Direction: Your viewers know what they want—listen to them.
- Engaging Niche Audiences: Speaking directly to your community increases visibility and loyalty.
So, if you’re sweating buckets over your next AMV, remember: sometimes, your voice is your biggest asset. And if it’s in Hindi, it might just be your secret weapon.
Sanjez’s AMV Magic: The Quest to Recreate Complex PC Edits on Mobile
Who is Sanjez, and What’s So Mind-Bending About His Style?
If you’ve ever fallen down the YouTube rabbit hole of Anime Music Videos (AMVs), you might have stumbled across Sanjez—a Russian AMV editor whose work feels like a visual earthquake. His signature? Hard shake effects that make every beat hit harder, typography transitions that dance with the music, and a wild technique called reverse time remapping. It’s not just editing; it’s choreography for your eyes.
Sanjez crafts his magic using After Effects 2023 on a high-spec PC. The result? Edits that look impossible to recreate anywhere else. But here’s the million-dollar question: Can you really mimic these jaw-dropping effects on a humble phone?
Can You Really Edit Like a Pro on Mobile? Time to Bust Some Myths.
Let’s be real. Most of us don’t have a supercomputer or the latest version of After Effects. As Sanjez himself proves, high-end gear can make things easier—but it’s not the only way. When asked, “Can we make such edits in Alight Motion?” the answer is surprisingly honest:
"To iska jawab hai, yes and also no."
Why “no”? Because Sanjez’s workflow on After Effects leverages features and processing power that mobile apps can’t fully match. His computer is a beast, and his edits are built for speed and complexity. But here’s where things get interesting—“yes” is also true, because Alight Motion is a powerhouse for mobile editing if you know how to push its limits.
Tales of Experimental Edits: You Don’t Need a Supercomputer (or to Be Rich)
Think you need to be rich to make killer AMVs? Think again. Most of us are editing on budget phones, sweating buckets as we try to keep up. But with Alight Motion, you can get surprisingly close to those high-end PC effects—if you’re willing to experiment.
- Hard Shake: Use multiple keyframes and motion blur in Alight Motion to simulate Sanjez’s signature shakes. Play with the graph editor to make your shakes feel organic, not robotic.
- Typography Transitions: Layer text, animate each letter, and use masks to create smooth, dynamic transitions. It takes patience, but the results are worth it.
- Reverse Time Remapping: While Alight Motion doesn’t have a one-click reverse remap, you can manually split clips, reverse segments, and adjust speed to mimic this effect. It’s not as fast as on PC, but it’s possible.
Here’s the secret: Experimentation bridges the PC-mobile quality gap. Alight Motion’s robust tools let you simulate advanced desktop effects through creative use. You might not match every detail, but you can capture the spirit of Sanjez’s AMV editing style—right from your Android device.
So, next time you watch a Sanjez AMV and think, “I could never do that,” remember: you don’t need a supercomputer. You just need creativity, patience, and a willingness to experiment with mobile editing tools like Alight Motion.
Step-By-Step (and Beat-By-Beat): How Clips, Transitions, and Human Sweating Make an Edit Pop
Editing AMVs on mobile isn’t just about lining up clips and hitting export—it’s about channeling emotion, intention, and yes, sometimes buckets of sweat into every second. If you’ve ever tried to follow a Beginner Tutorial and found yourself lost in timelines, shaky hands, and endless retakes, you’re not alone. Let’s break down how you can make your edit pop, even when you’re working from a hot, noisy room with only your phone and your persistence.
Arranging Clips: More Montage, Less Math
Start by gathering your best moments. Don’t stress about time remapping on every single clip—especially on Android, where subtle time changes often blend seamlessly with shake effects. Instead, focus on the story you want to tell. Place your most impactful scenes at the beginning, and trim out anything that doesn’t fit the vibe. For example, if you’re editing a sequence where Muzan steps out of the fog, ask yourself: does this moment set the tone? If not, move it or trim it. Editing is about feeling, not formulas.
Beat Marking: Editing to the Rhythm
Once your clips are arranged, use beat marks to sync your cuts with the music. This is where your edit starts to breathe. Mark the beats at key moments—like 0:50 or 1:40—then trim your clips to land on those points. This simple step instantly makes your edit feel more professional and energetic.
The Truth About Shake and Transition Effects
Here’s the secret: Smooth Transitions and shake effects aren’t always perfect. Sometimes, the process is messy. You’ll add a shake, realize it hides a rough cut, and move on. Other times, you’ll spend ages tweaking a Keyframe Transition graph, only to redo it after previewing. That’s normal. The magic is in experimenting—try different overlays, duplicate layers, and play with keyframes until something clicks. Even on mobile, you can create custom graphs for transitions: scale down, move right, adjust the curve. Suddenly, your edit pops.
"Main paseene mein bilkul tar-ba-tar hua hoon."
Editing in a cramped room, sweating through retakes, and fighting background noise isn’t glamorous—but it’s real. Many creators spend 30 minutes (or more) on a single voiceover, only to redo it because of a stray noise or a missed cue. Sometimes, it takes over an hour just to get the right take. That’s the part you don’t see in polished tutorials, but it’s what makes every edit feel earned.
Why Voiceover Tutorials Matter When You’re Sweating Buckets
When you’re stuck, a good tutorial is like a friend in the room. Hearing someone explain how to use keyframes, how to sync transitions, or how to hide a rough cut with a shake effect makes the process less intimidating. It’s proof that even pros struggle—sometimes, they’re literally dripping with sweat, just like you.
- Tip: Don’t aim for perfection. Aim for progress. Each timeline, each keyframe, each retake is a step closer to your vision.
- Tip: Use overlays and presets from trusted sources (like Telegram channels) to speed up your workflow.
Editing AMVs on mobile is accessible to beginners, but it’s persistence and creative risk-taking that make your edit stand out. Embrace the sweat—it’s part of the process.
Wild Card: Download, Preview, and (Don’t Forget) Show Off Your Creation
So, you’ve trimmed, synced, and sprinkled every effect you could find—now comes the moment every AMV editor waits for: the preview. This is where your hard work comes to life, and you finally see if your vision matches what’s on the screen. But before you hit that play button, let’s talk about a secret weapon that can take your mobile AMV editing to the next level: free presets, elements, and settings—all available through my Telegram channel.
Here’s the deal: I know how tough it can be to start out, especially when you don’t have a library of cool effects or the perfect transitions. That’s why I’ve set up a dedicated Telegram channel where you can grab all the material, presets, elements, and even the exact settings and phrases I use in my own edits. And yes, as I always say,
"Free hai, koi paise nahi hai."No hidden charges, no locked content—just pure, beginner-friendly resources to help you break the mold. This is the heart of the AMV Editing Community: sharing, supporting, and growing together, no matter your skill level.
Once you’ve downloaded your favorite presets and elements, it’s time for that all-important preview. Don’t rush this step—watch your edit from start to finish, check every beat, every transition, and every lyric sync. This is your chance to catch any little mistakes and polish your creation until it shines. It’s a satisfying moment, seeing all your ideas come together on the screen. And if you’re following along with my Beginner Tutorials, you’ll know exactly how to tweak things for that pro-level finish.
But here’s where a lot of new editors freeze: sharing their work. Maybe you’re worried it’s not perfect, or you think others won’t get it. Trust me, we’ve all been there. But the truth is, putting your AMV out there—flaws and all—is what connects you to the real editing community. When you share your video, whether it’s with friends, on YouTube, or in our Telegram group, you’re not just showing off your skills. You’re inviting feedback, making friends, and inspiring others who are just starting out. That’s how you become part of something bigger than just your own project.
So, after you preview, don’t forget to hit that like button if you enjoyed the tutorial, and share your own creation with the world. Drop your video in the comments, send it to your friends, or post it in our Telegram channel. Every share, every like, every bit of feedback makes our AMV Editing Community stronger and more supportive. Remember, accessible resources like free presets and open tutorials are what lower the barrier for beginners and help everyone grow together.
Ready to show off your work? Download the materials, preview your masterpiece, and don’t hold back—your next edit could inspire someone else to start their journey. See you in the community!


